I often get asked how I store my quilling paper. Trust me, it’s not an easy task when it comes to keeping quilling papers organized! I’ve used different methods, but this seems to work fairly well. Plus it looks so pretty when the papers are altogether!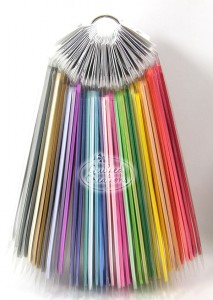
First, I highly recommend keeping your quilling paper in the package because it’ll keep your papers from creasing or tangling. I like the 17-inch length of our Quilled Creations papers because they stack neatly side-by-side and they fit in those standard storage bins with drawers! (Also, majority of my designs use strips 16-inches or less! The extra inch on the paper lengths allows you to tear off the ends – a good quilling technique!)
Use a binder ring and feed it through the hole in the packaging. You can find these at your local office supply store.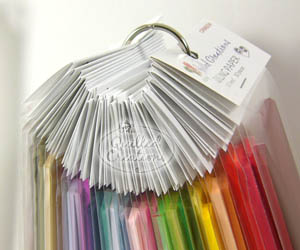
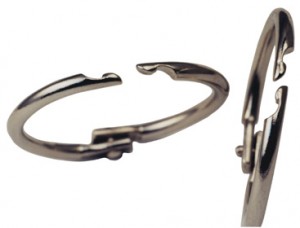
Use one ring for all of your colors or several rings and group them by like colors.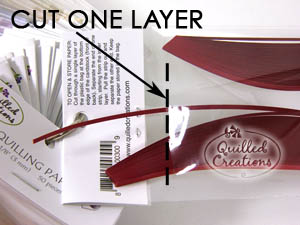
Next, use scissors to cut an opening though the bag. CUT ONLY ONE LAYER of the bag. Avoid cutting to the bag’s edge or it might rip completely from the label. If it does happen, then just reinforce the cut ends with tape. You only need a hole big enough to pull one end of the paper out.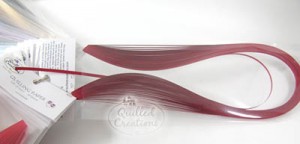
Detach a quilling strip from the inner layer (see photo). Pull a strip out and detach it from the other end. Simple! No kinks, no bends, no tangle! (Technique Tip: Once I have the strip out of the packaging, I immediately tear off the ends or the padding glue that might still be on the paper ends. You want to have a feathered torn end so when the paper’s end is glued to the coil it will look seamless!)
With multi-colored quilling packs, I use zip-lock bags or the 6″ x 9″ bags that our kits are stored in. I try to keep like colors together. It doesn’t always happen, especially when I’m in a rush to take some quilling paper on a trip or for a class. But the bags helps store those loose strips of quilling paper.
Another tip to hold your mixed/multi-colored paper packs (or papers from a quilling kit), is to fan the paper out and use a binder clip at one end of the paper. At the other end, cut or tear off the glued ends so that the strips are all separated. Then when you need a certain color, you just tear if off the binder clip.
Hang all of the papers so that they are within easy reach.
Hope this gives you some ideas for an organized craft/quilling area!!
- Register
- Log in
- Shopping cart 0 You have no items in your shopping cart.
Blog archive
- 2020
- 2019
- 2017
- 2016
Quilling Paper Storage
Monday, January 16, 2017
Leave your comment

I'd be embarrassed to show you my papers, mostly shoved into baggies.
I will defiantly be trying your hints.
I separate the colors and use 3 bands per set of strips, 2 on
each end and one in the middle. Then lay them flat in
kitchen utensil drawer inserts.
Thanks very much for sharing such a do-able, simple, and great idea!
. If I am on the go and want to take my tools and paper, I just remove the individual color cases that I am not using and just pack my tools on those areas. The case has a handle and snaps close. I found mine in the local hobby store for half the price. Here is an example to look at:
novelinks Transparent 4" x 6" Photo Cases and Clear Craft Keeper with Handle - 16 Inner Cases Plastic Storage Container Box (Multi-Colored) https://www.amazon.com/dp/B07C8C2FXX/ref=cm_sw_r_cp_api_i_EJTGVR59Z3CGC17581A4
I put 1mm on 1 hanger, 1.5 on another, etc. The colors are sorted white to black. When I need a color, I just unsnap the package and return it when finished. The hangers all hang on a heavy rod by size 1mm-10mm, then metallics, quillography, etc.
I also carefully clip an opening to get the strips. I use tiny scissors to make a slot at the top of the bag, in the back of the package only as QC explained above.
I really hope this isn’t confusing!! It’s hard to explain without posting a photo!